Just another Tensorflow beginner guide (Part4 - Google Cloud ML + GUP + Keras)
Now, let’s try train our simple sentiment machine learning model on Google cloud.
You can checkout the reference code I used in this example from here (click)
Note that we will use the Tensorflow sample code created in the previous post - Part 2 - example-3.py
Google Cloud Machine Learning Engine - Tensorflow
Prepare your Google Cloud Machine Learning Engine
Firstly follow this guide below https://cloud.google.com/ml-engine/docs/quickstarts/command-line
Basically you need to
- Go to the cloud console project page
-
Create a project for this tutorial, let’s call it
tf-learn-simple-sentiment. And you do it by clickCreate Projectbutton: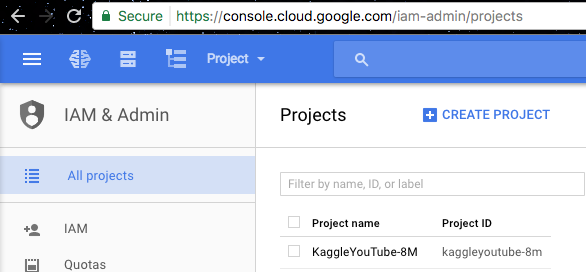 Click the CREATE PROJECT button
 - Enable billing for it if you haven’t
-
Enable API for this project
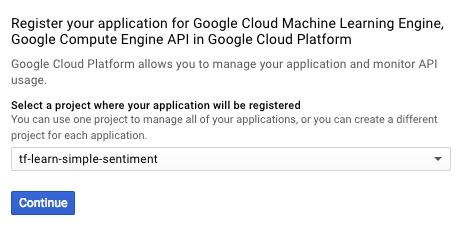 Click the continue button
 - Install the Gooogle Cloud SDK and login. Just follow the step here (And you probably have to install Python 2.7 and make an virtual env for it before going further). Pay attention to the service region (I use europe-west1) as later you will specify it when creating bucket or creating training jobs
- Verify process by running
gcloud ml-engine models listand you should see:Listed 0 items.d
python -m tensorflow.tensorboard --logdir=./tmp/example-3 --port=8000 --reload_interval=5
Upload training data into Google Cloud storage
Setup bucket and copy the model input data into it:
gsutil mb -l europe-west1 gs://tf-learn-simple-sentiment
gsutil cp -r sentiment_set.pickle gs://tf-learn-simple-sentiment/sentiment_set.pickle
After this you should be able to see your data file created at google cloud console.
(Click the Storage button from the left panel and make sure the project is selected correctly)
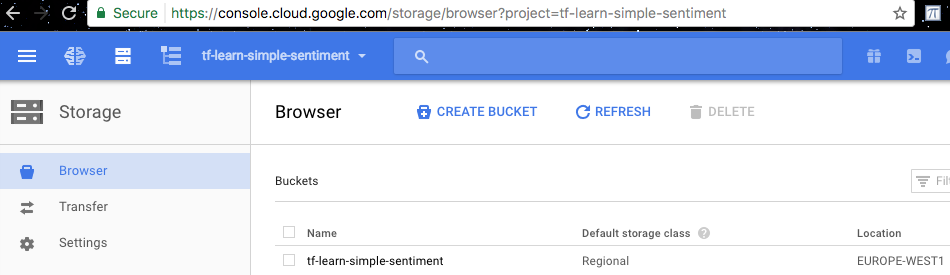 Bucket created
https://cloud.google.com/ml-engine/docs/how-tos/getting-started-training-prediction
Update our model to have training data location as a parameters
As we will later running our model on the cloud, we need to let the model to run with a parameter of the training data location. So that we can test
the model locally with --train-files=sentiment_set.pickle, then on the Google cloud we run the model with --train-files=gs://tf-learn-simple-sentiment/sentiment_set.pickle.
In order to do this, we update our example5.py code by creating
a function called train_modle() which contains most part of the
code and add a main function to call on this train_modle function:
# example5.py
import ...
from tensorflow.python.lib.io import file_io
...

def train_model(train_file='sentiment_set.pickle', **args):
    # Here put all the main training code in this function
    file_stream = file_io.FileIO(train_file, mode='r')
    train_x, train_y, test_x, test_y = pickle.load(file_stream)
    ...
    ...

if __name__ == '__main__':
    parser = argparse.ArgumentParser()
    # Input Arguments
    parser.add_argument(
      '--train-file',
      help='GCS or local paths to training data',
      required=True
    )

    parser.add_argument(
      '--job-dir',
      help='GCS location to write checkpoints and export models',
      required=True
    )
    args = parser.parse_args()
    arguments = args.__dict__
    job_dir = arguments.pop('job_dir')

    train_model(**arguments)
Note that in order to let the code can access gs://file file format from Google Cloud Storage,
we need to use a different library to open the file tensorflow.python.lib.io.file_io.FileIO(train_file, mode='r') (as suggested on a stack-overflow answer or answer)
Also note that we need to add --job-dir as a parameter here, not because
our code needs but, it is because later when running on cloud, google
cloud will call on our example5.py with this parameter. To make it work we have to just take in this parameter here for now.
Running locally
- Firstly verify now that you can run the python training code manually via python command:
# under folder example-5-google-cloud, run $ python -m trainer.example5 --train-file=sentiment_set.pickle --job-dir=./tmp/example-5 - If that works, now try running it again locally via Google Cloud SDK tool
gcloudjust to verify the code again:# under folder example-5-google-cloud, run $ gcloud ml-engine local train \ --module-name trainer.example5 \ --package-path ./trainer \ -- \ --train-file sentiment_set.pickle \ --job-dir ./tmp/example-5(Alternatively, run the
gcloud.local.run.shscript, it has the same contents.)
If it all works, you should see some model training output just as if you normally run the example5.py model locally using python command above.
And you should be able to use the tensorboard to see the output as well:
python -m tensorflow.tensorboard --logdir=./tmp/example-5/logs --port=8000 --reload_interval=5
Then you should be all set for running the job on the Google Cloud.
Running on cloud (with GPU)
- Firstly create a config file
config=trainer/cloudml-gpu.yamlunder folder trainer:trainingInput: scaleTier: CUSTOM # standard_gpu provides 1 GPU. Change to complex_model_m_gpu for 4 GPUs masterType: standard_gpu runtimeVersion: "1.0" - Then running the code on the cloud should be simple now as we have prepared everything for it,
simple run command like this:
(Note that you probably will have to change the
REGION=europe-west1to be the same region you chose when you creating the bucket in previous steps)export BUCKET_NAME=tf-learn-simple-sentiment export JOB_NAME="example_5_train_$(date +%Y%m%d_%H%M%S)" export JOB_DIR=gs://$BUCKET_NAME/$JOB_NAME export REGION=europe-west1 gcloud ml-engine jobs submit training $JOB_NAME \ --job-dir gs://$BUCKET_NAME/$JOB_NAME \ --runtime-version 1.0 \ --module-name trainer.example5 \ --package-path ./trainer \ --region $REGION \ --config=trainer/cloudml-gpu.yaml \ -- \ --train-file gs://tf-learn-simple-sentiment/sentiment_set.pickle(Alternatively, run
source gcloud.remote.run.shscript, it has the same contents.)
Then you should be seeing some logs output in your local terminal. The same log can be found on the google cloud console as well. Also the console log is showing a Teska K80 prepared for training the model:
 (I am not sure why those logs are marked as ERROR. Please comment if you’ve got some clue on it.)
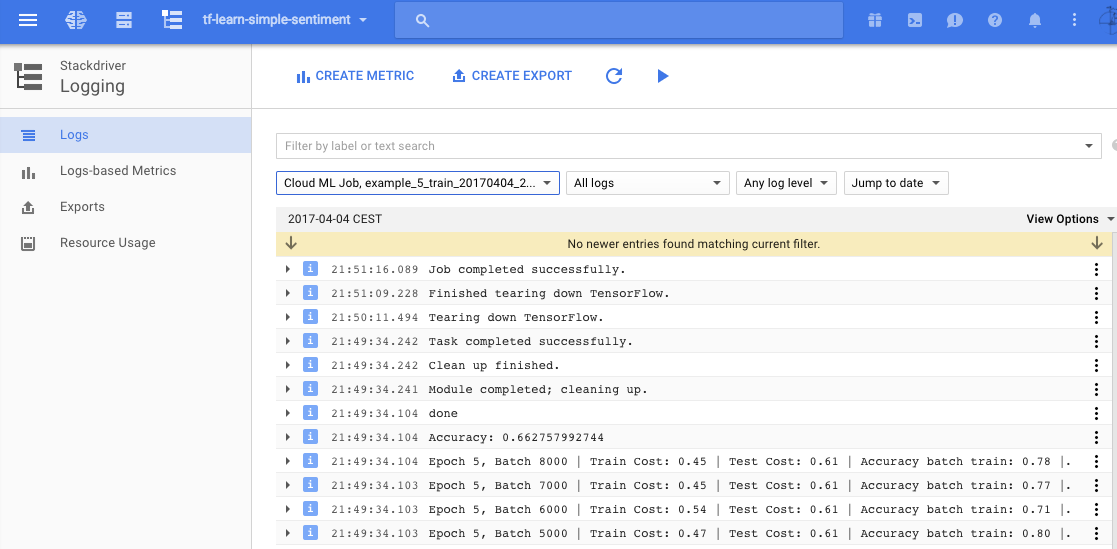 Logging view on google cloud
On the storage tab of the cloud console, noticing that those model summary logs are also written out in specified folders:
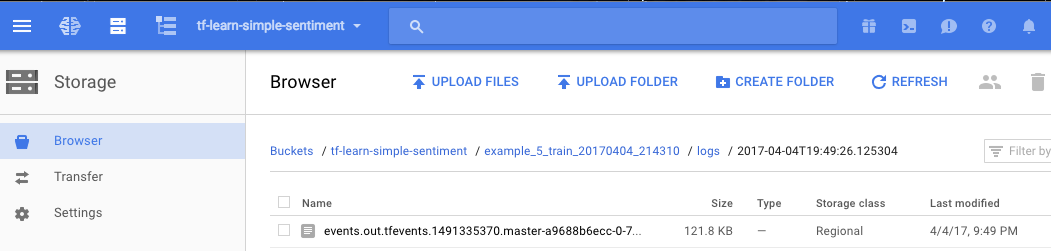 Storage view on google cloud
- And then you can use the tensorboard to view the training logs and graph
by doing:
$ echo tensorboard log dir: ${JOB_DIR}
$ tensorboard --logdir=${JOB_DIR}/logs --port 8000 --reload_interval=5
(Alternatively running script
gcloud.tensorboard.show.shfrom example code base). If no graph is shown or no${JOB_DIR}output from the command, make sure you run the previous script withsource, such assource gcloud.remote.run.shso that environment variables can be exported properly.
Open browser on localhost:8000, you should be able to see the loss and accuracy info as I see them now:
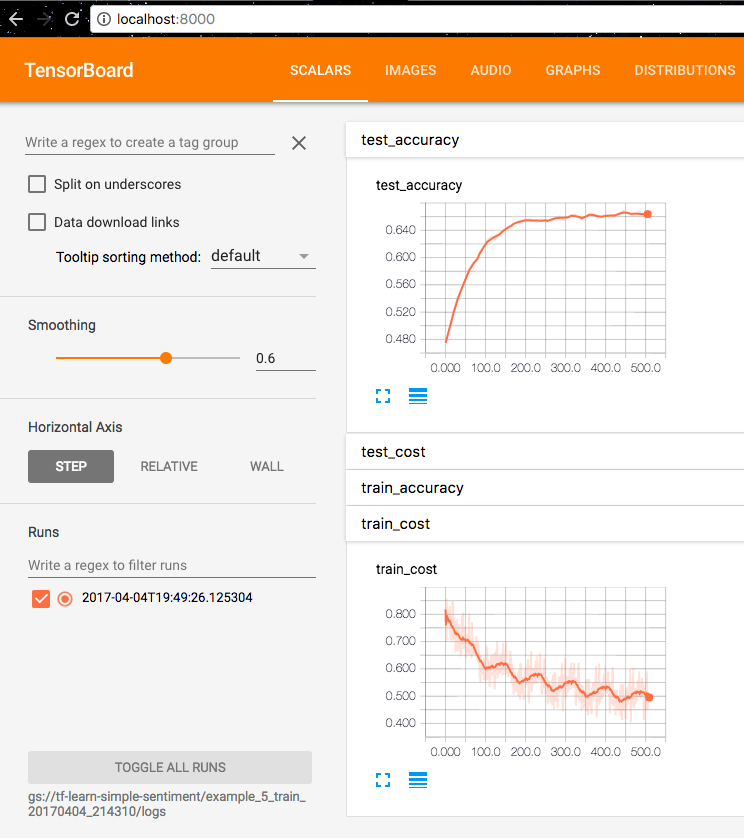
If you could not see any results, make sure in your code that the tf.summary.FileWriter’s flush function is called in the end to for sure output those logs.
# call this after writer add all the summaries
writer.flush()
Contragulations, now you have made a simple Tensorflow model and trained on Google Cloud with a Tesla K80 graphic card.
Google Cloud Machine Learning Engine - Keras
Naively thinking, if I just change the Tensorflow code to a Keras code, with the same way of loading training data, it should more or less working on Google Cloud ML engine, right?
Let’s give it a try.
Keras code that works locally:
Now I will just post a Keras version of the above TF model here (for your convenience I will just put all the code here):
# example5-keras.py
import numpy as np
np.random.seed(42)
import tensorflow as tf
tf.set_random_seed(42)
from tensorflow.python.lib.io import file_io
from datetime import datetime
import time
# import cPickle as pickle
import pickle
import argparse

import keras
from keras.models import Sequential
from keras.layers import Dense, Dropout
from keras.optimizers import RMSprop

# reset everything to rerun in jupyter
tf.reset_default_graph()

batch_size = 100
num_classes = 2
epochs = 10

N_X = 423 # len(train_x[0])
layer1_size = 32

def train_model(train_file='sentiment_set.pickle', job_dir='./tmp/example-5', **args):
    logs_path = job_dir + '/logs/' + datetime.now().isoformat()
    print('-----------------------')
    print('Using train_file located at {}'.format(train_file))
    print('Using logs_path located at {}'.format(logs_path))
    print('-----------------------')
    file_stream = file_io.FileIO(train_file, mode='r')
    x_train, y_train, x_test, y_test  = pickle.load(file_stream)

    x_train = x_train.toarray()
    x_test = x_test.toarray()

    x_train /= np.max(x_train)
    x_test /= np.max(x_test)

    print(x_train.shape, y_train.shape, 'train samples,', type(x_train[0][0]), ' ', type(y_train[0][0]))
    print(x_test.shape,  y_test.shape,  'test samples,',  type(x_test[0][0]),  ' ', type(y_train[0][0]))

    # convert class vectors to binary class matrices. Our input already made this. No need to do it again
    # y_train = keras.utils.to_categorical(y_train, num_classes)
    # y_test = keras.utils.to_categorical(y_test, num_classes)

    model = Sequential()
    model.add(Dense(layer1_size, activation='relu', input_shape=(N_X,)))
    model.add(Dropout(0.2))
    # Already overfitting, no need to add this extra layer
    # model.add(Dense(layer1_size, activation='relu'))
    # model.add(Dropout(0.2))
    model.add(Dense(num_classes, activation='softmax'))

    model.summary()

    model.compile(loss='categorical_crossentropy',
                  optimizer=RMSprop(),
                  metrics=['accuracy'])

    history = model.fit(x_train, y_train,
                        batch_size=batch_size,
                        epochs=epochs,
                        verbose=1,
                        validation_data=(x_test, y_test)
                        )
    score = model.evaluate(x_test, y_test, verbose=0)
    print('Test loss:', score[0])
    print('Test accuracy:', score[1])

    model.save('model.h5')

    # Save model.h5 on to google storage
    with file_io.FileIO('model.h5', mode='r') as input_f:
        with file_io.FileIO(job_dir + '/model.h5', mode='w+') as output_f:
            output_f.write(input_f.read())


if __name__ == '__main__':
    parser = argparse.ArgumentParser()
    # Input Arguments
    parser.add_argument(
      '--train-file',
      help='GCS or local paths to training data',
      required=True
    )
    parser.add_argument(
      '--job-dir',
      help='GCS location to write checkpoints and export models',
      required=True
    )
    args = parser.parse_args()
    arguments = args.__dict__

    train_model(**arguments)
It turned out that locally it works with gcloud command:
gcloud ml-engine local train \
  --module-name trainer.example5-keras \
  --package-path ./trainer \
  -- \
  --train-file sentiment_set.pickle \
  --job-dir ./tmp/example-5
But the try run the code remotely on Google Cloud:
export BUCKET_NAME=tf-learn-simple-sentiment
export JOB_NAME="example_5_train_$(date +%Y%m%d_%H%M%S)"
export JOB_DIR=gs://$BUCKET_NAME/$JOB_NAME
export REGION=europe-west1

gcloud ml-engine jobs submit training $JOB_NAME \
  --job-dir gs://$BUCKET_NAME/$JOB_NAME \
  --runtime-version 1.0 \
  --module-name trainer.example5-keras \
  --package-path ./trainer \
  --region $REGION \
  --config=trainer/cloudml-gpu.yaml \
  -- \
  --train-file gs://tf-learn-simple-sentiment/sentiment_set.pickle
will give you an error:
import keras failed... No module named Keras...
Make the training job install Keras before running
To get things going, it turned out that we need to to install Keras (or some other modules you need) with a setup.py script and put it on the same place folder where you run the gcloud command:
# setup.py
from setuptools import setup, find_packages

setup(name='example5',
  version='0.1',
  packages=find_packages(),
  description='example to run keras on gcloud ml-engine',
  author='Fuyang Liu',
  author_email='fuyang.liu@example.com',
  license='MIT',
  install_requires=[
      'keras',
      'h5py'
  ],
  zip_safe=False)
After saving the file you should expect to have a folder structure look like this:
├── setup.py
└── trainer
    ├── __init__.py
    ├── cloudml-gpu.yaml
    ├── example5-keras.py
With this setup.py, now you should be able to run the above gcloud ml-engine jobs submit training command successfully and see the Keras
model trained on Google Cloud with GPU:

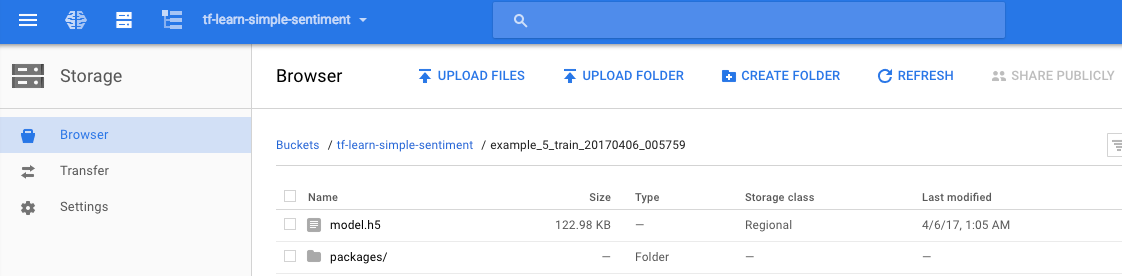
And we could see the model is also saved successfully in the google storage of our project bucket, under the folder marked by the job name.
(Note that in order to save the h5 type of model, we had to add h5py package in the setup.py script above)
Summary
Contragulations, now you have made a simple Keras model and trained on Google Cloud with a Tesla K80 graphic card.
From here you should be capable of using a much larger dataset and perhaps a much more complex model for some doing real fancy applications :)